Dithering occurs when you have a limited number of colors, say 256 for GIF's or 2 for black and white, and want to represent subtle gradations between colors without creating bands of color. The resulting images take up far less space than those with colorspaces of thousands or millions of colors. GIMP can handle dithering, although it's not obvious how to do so.
Goal:
Although dithering is a sign of low quality, I personally like its effects. And the continued popularity of 256-color GIFs supports me. I wanted to turn a full-color image into a black-and-white image, and also see how many kilobytes smaller it became.
Walkthrough
- I chose this photo of the Cat Eye Nebula, from NASA's Hubble site. I shrank it down to 500 by 400 pixels, to more clearly see the effects of dithering, and exported it as a PNG, default settings. It weighs in at 292 kB.
- To start dithering, go to Image > Mode > Indexed... in the menubar. It'll pop up a window like the one below, where you can choose the colormap. You have the option to map it to several palettes, or a web-optimized palette, but why use any colors at all? Choose "Use black and white (1-bit) palette" to get the lowest quality possible. Then next to "Color dithering", choose any of the options.
-
Save and export, if you choose. The PNG format may yield better results than JPEG because it's a lossless compression algorithm.
Result
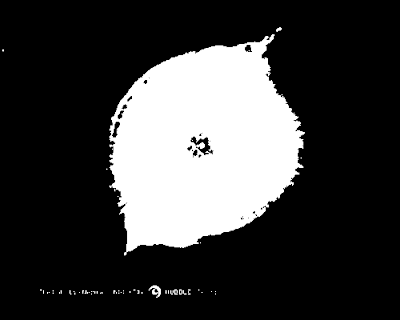
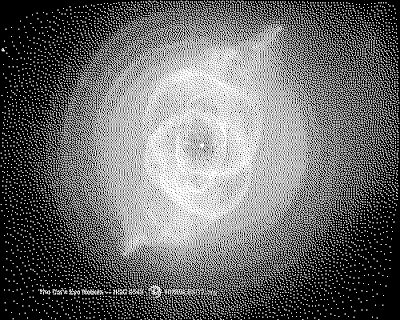
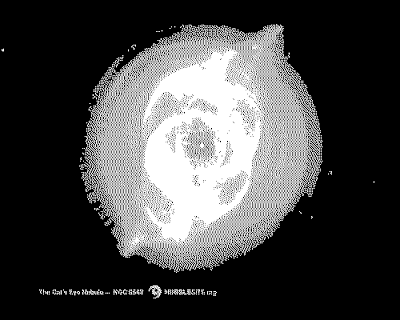
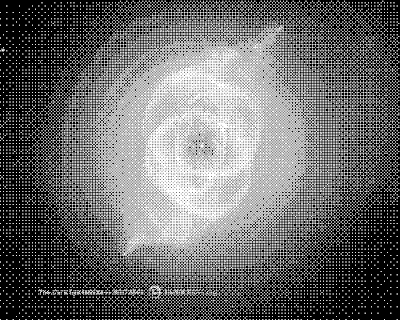
These are the results of the 4 choices of dithering mode: "None" gives you featureless blotches, while the other choices of dithering cleverly intersperse white and black pixels to give the appearance of different gray tones.
 |
| None (no dithering): 4 kB |
 |
| Floyd-Steinberg (normal) (my preference): 19 kB |
 |
| Floyd-Steinberg (reduced color bleeding): 9 kB |
 |
| Positioned: 7 kB |
Learn More
Here is the GIMP documentation for this feature.


